The Tree Interface can be a useful way to allow a user to select input values for an app. Since sometimes setting up the Tree File Data Source can be a little tricky to those new to this interface, this example will step through the creation of the Data Source for a simple Tree Interface.
To use a Custom File or Database as the source for the Tree Interface tool, the source needs to be in a specific format: a table with a Description and a Key field. It will look something like this:
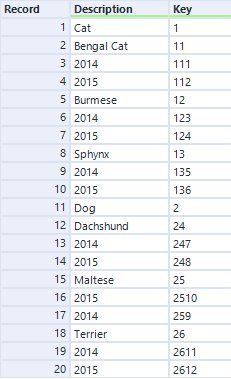
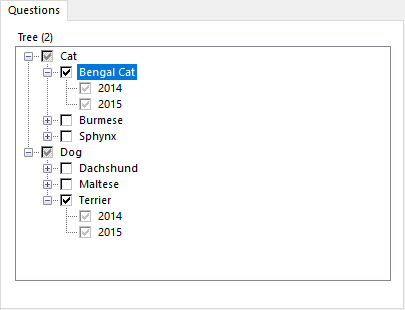
And result in an interface that looks like this:
Let’s start with our original data, some very pretend pet statistics:
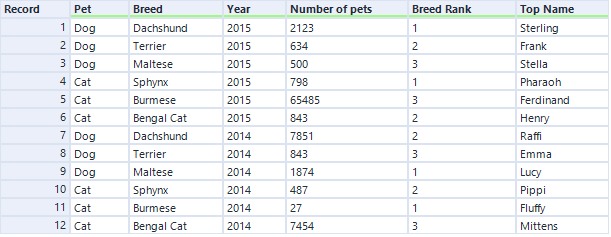
The first step is to determine the fields that will be used in the interface; in this case, we want to be able to select the fields Pet, Breed, and Year in the Tree Interface. These will become the different levels in the interface.
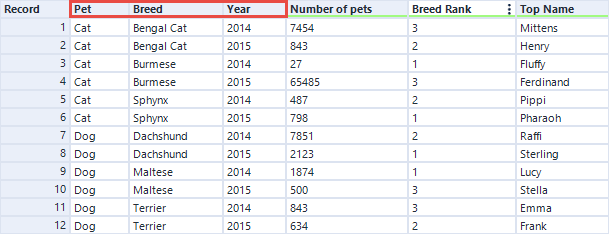
Next, we need to determine the level in which our fields of interest will appear in the tree -- the Pet field being the most general and Year being the most detailed. Sorting in this order will make sure all the data is aligned properly. All the Cat records will be together, then all the Breed records will be together, and finally all year records.
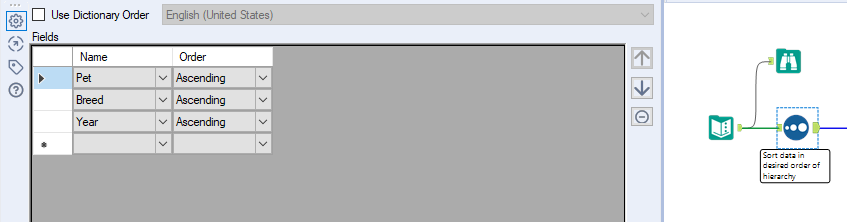
Once the data is sorted, unique identifiers need to be created for each record to establish the hierarchy.
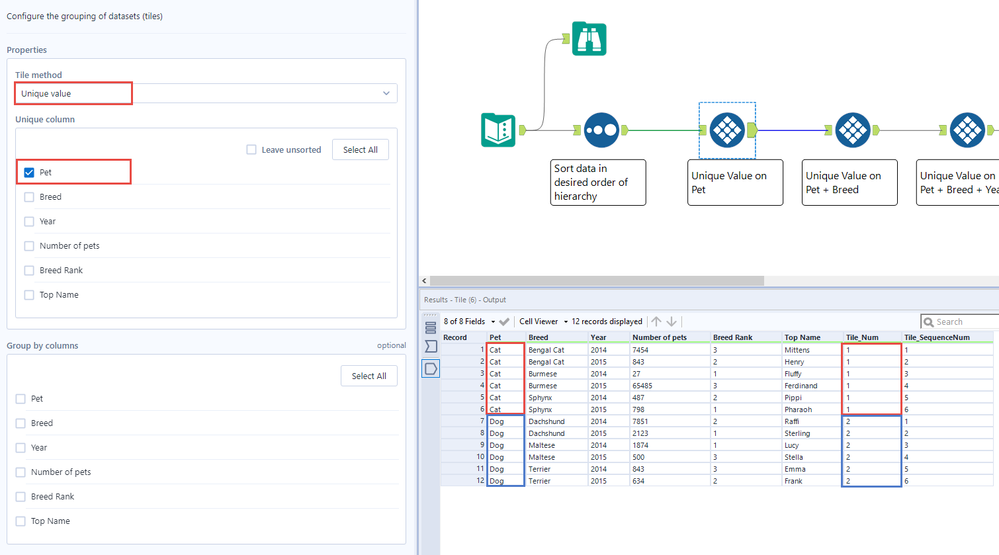
The first level in the hierarchy is the Pet field. To create an identifier for each unique value in the Pet field, the Tile tool can be configured to look for Unique Values on the Pet field. The unique value for the Pet field will be in the Tile_Num field.
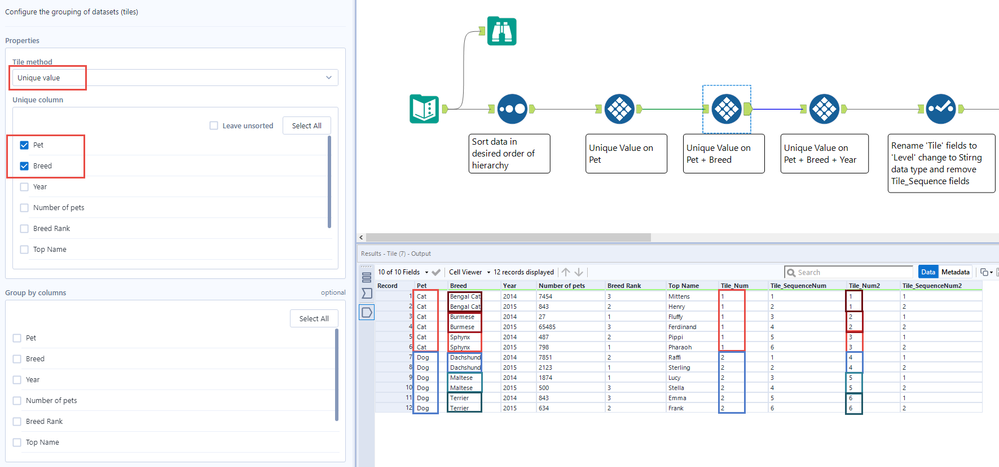
This process needs to be repeated for the Breed and Year fields. The Tile tool for the Breed field will again be configured to Unique, but this time under Unique Fields Pet and Breed will be selected.
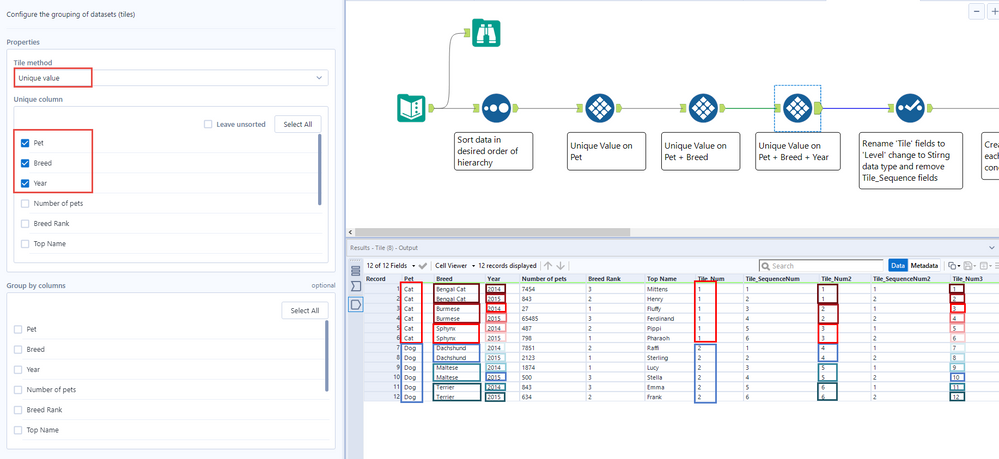
Finally, Year.
For times when there are 10 or more levels in a Tree Tool, please see the Spoiler below:
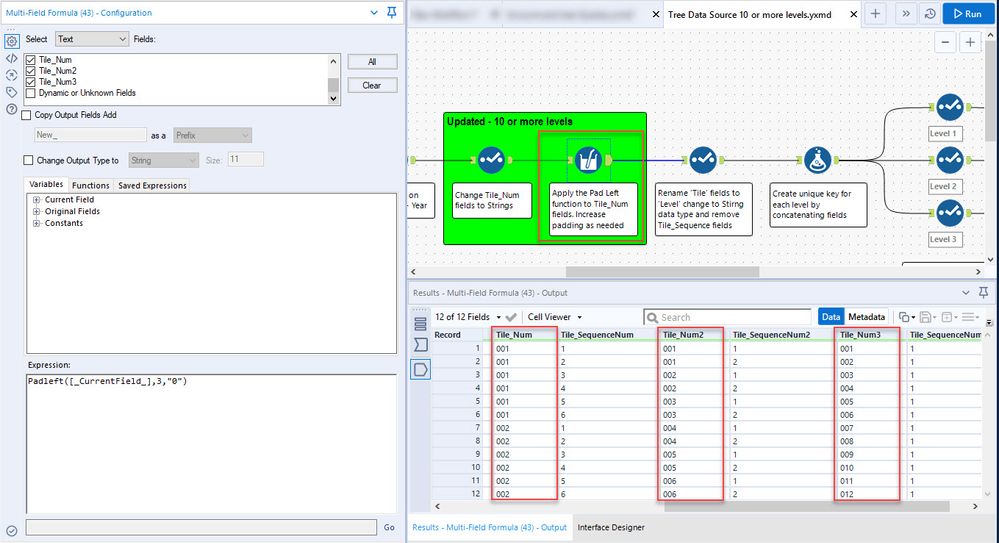
Adding the padding to the front of each level number will allow the concatenated values of all levels to be unique and should not cause issues when working with 10 or more levels in a Tree Interface.
An additional workflow is attached that demonstrates adding the Padleft() portion, Tree Data Source 10 or more levels.yxmd (version 2018.4).
A little cleanup was done using a Select Tool. Three things were done: all the Tile_Sequence fields were removed, the Tile_Num fields were renamed to the appropriate Level number to make things a little easier in subsequent steps, and each Level field was changed to a string so they could be concatenated in the next step.
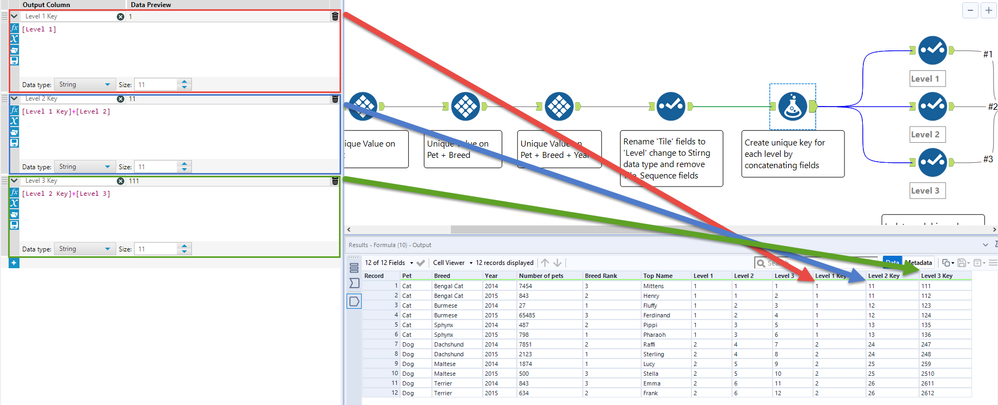
Now we have all the information we need to build a key for each level of our data for each record. A Formula tool is used to create 3 new fields, one for a key at each level. Our Level 1 Key will just be the value from the Level 1 field. The Level 2 Key will be the Level 1 Key concatenated with the Level 2 field, and the Level 3 Key will be the Level 2 Key concatenated with the Level 3 field.
Now that there is a key for each level we can construct a table that has the necessary Description and Key fields. Using a set of Select tools, select each Level Key field with its corresponding description field; Pet and Level 1 Key, Breed and Level 2 key, Year and Level 3 Key.
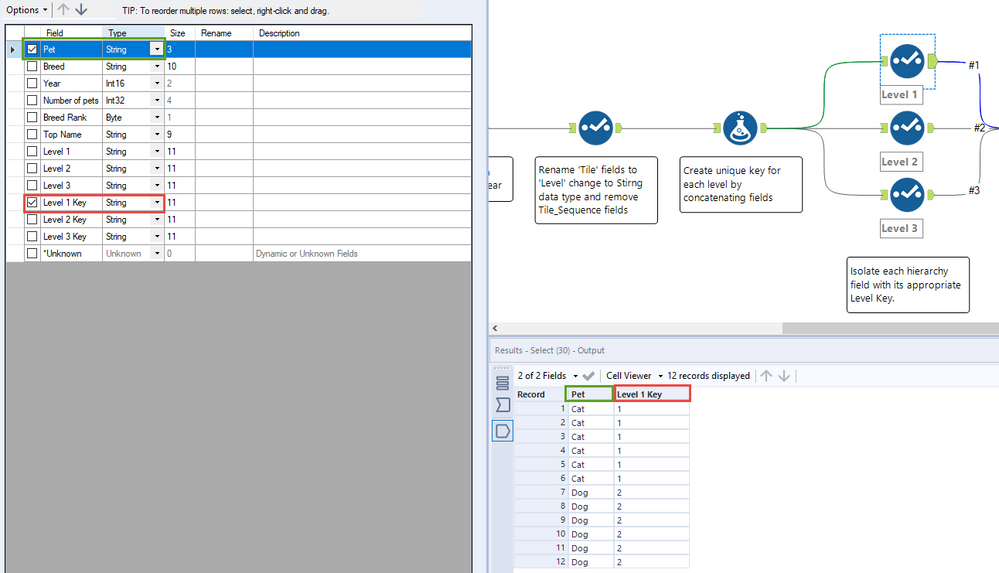
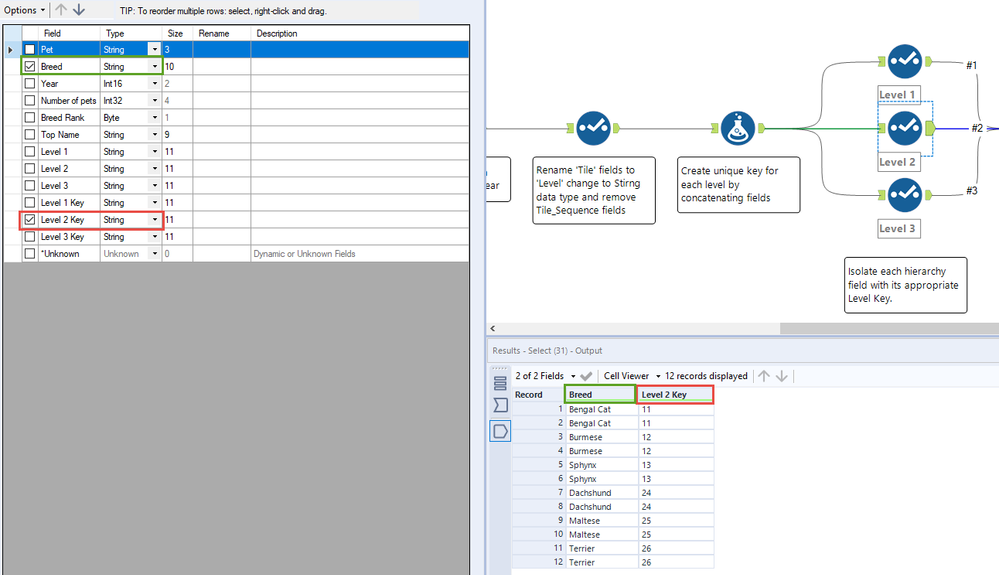
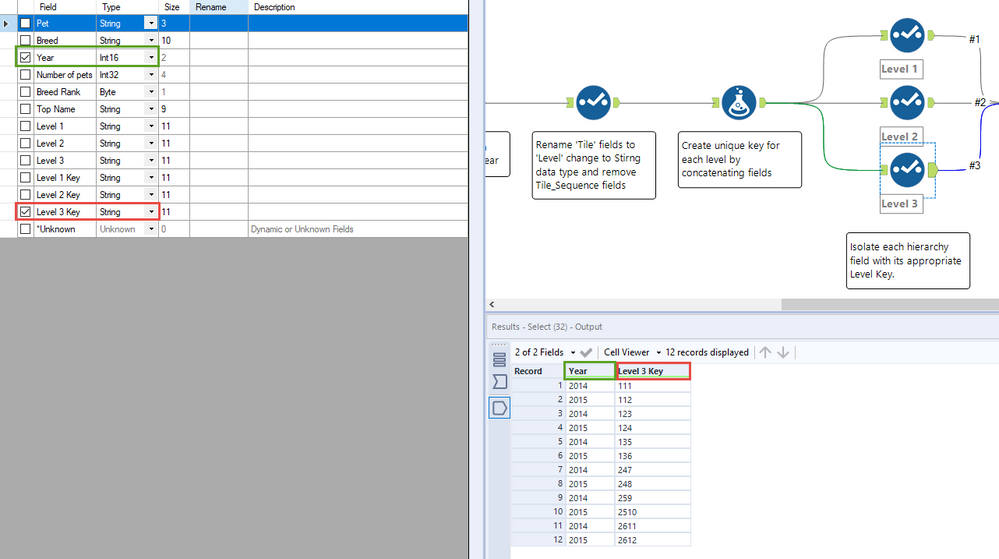
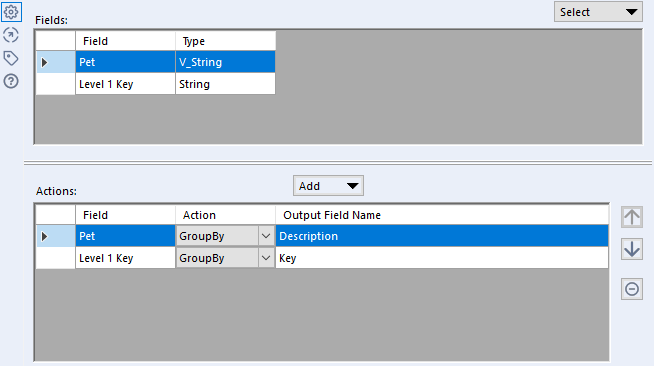
Now Union the three Select tools together by position. Add a summarize tool and group by Pet and Level 1 Key. Grouping by these fields will remove any duplicate records. The resulting fields were also renamed to Description and Key in the Summarize tool.
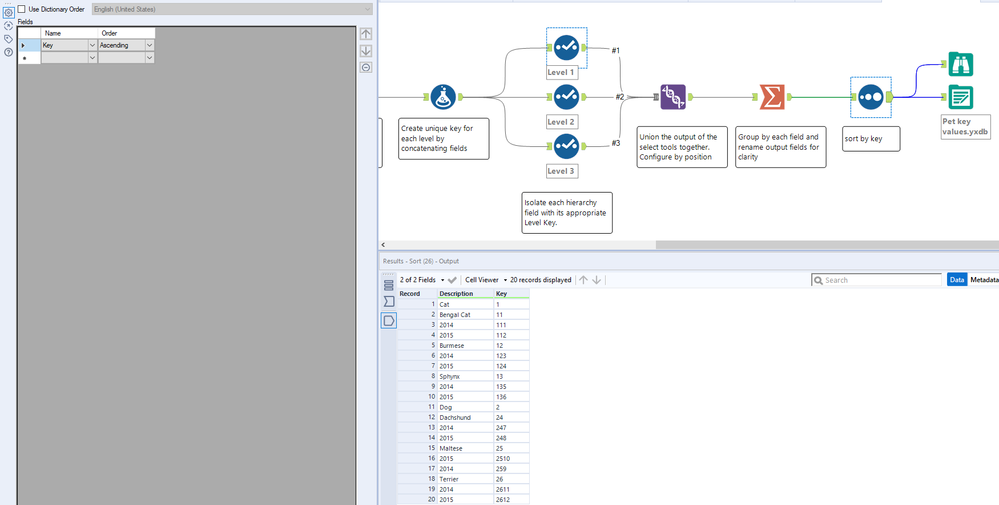
Finally, a Sort tool is added to sort the Key field in ascending order. The results from the sort can then be saved to a file or loaded into a database and used in the Tree Interface tool.
The entire workflow:
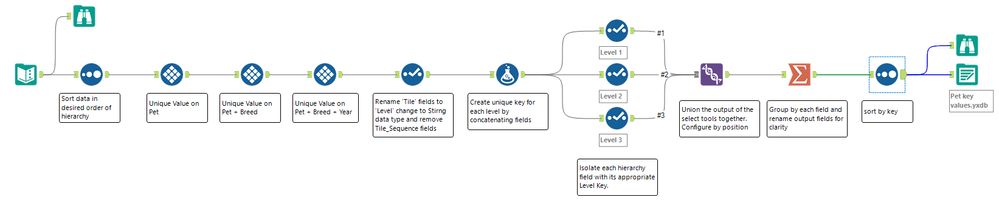
Attached is the workflow used to build the Key list, as well as a very simple app that demonstrates the resulting tree created from the key values.
See how to put this into action in Part 2